Showing posts with label Healthy Living. Show all posts

Wednesday, June 3, 2015

Strawberry Muffins | Gluten-free & Dairy-free

Strawberry Muffins (Gluten and Dairy Free) | Windy Poplars

It's strawberry season here in VA, and that means that many of us overly-ambitious types have refrigerators overflowing with these beautiful red gems - the harbingers of fresh fruiting season on the east coast! Though I'm all for having strawberry shortcake breakfast, lunch, and dinner, in case you happen to be looking for a new way to enjoy your berries, this delicious cinnamon-y take on a muffin is at once cozy, and fresh. And we all know how much I adore a good juxtaposition.

Perhaps the best part? Whip up some butter (or dairy-free alternative, if that's your ilk) with a dab of honey and a sprinkle of cinnamon to spread over these muffs fresh-from-the-oven style, and you might just slip into a state of altered bliss. No one will ever guess they're gluten free!

Strawberry Muffins | Gluten and Dairy Free

1 1/2 cups Bob's Red Mill Gluten Free All Purpose Flour Blend  
1 + 1/8 t xanthum gum
1/2 cup coconut sugar
1/2 T cinnamon
1/2 t baking soda
1/4 t salt
1/4 c honey
1 cup fresh strawberries, hulled, and finely chopped
1/2 cup unsweetened applesauce
evoo
2 egg whites

Pre-prep:
Preheat oven to 325. Grease 12 muffin cups or use paper liners.

Combine baking soda and salt in a small bowl. Mix well to remove all lumps from the soda. Set aside.

In a 1/2 cup measuring cup, fill most of the way with applesauce, leaving 1/2-1/4" head space. Fill to the brim with extra virgin olive oil. Set aside.

Directions:
In a large bowl add flour, xanthum gum, coconut sugar, cinnamon, and baking soda/salt mixture. Whisk to combine. In another bowl, mix honey, strawberries, egg whites, and applesauce/oil mixture. Stir well.

Combine wet ingredients with dry ingredients, stirring just until moistened. Distribute batter evenly between 12 muffin cups, and bake at 325 for 20-25 minutes, or until muffins test done.

Enjoy!

For a printable version of this recipe, CLICK HERE.


Stay in the loop >>> BLOGLOVIN' | FACEBOOK | INSTAGRAM | PINTEREST | TWITTER

Monday, June 1, 2015

In the Garden


Perhaps the most exciting time in our little garden, is when those first wee fruits start to appear! I'm one of those terribly impatient types that goes out and peeks under leaves religiously for days on end until I catch the teenie weenie-est glimpse of the promising harvest to come! Then I promptly call my husband, take pictures, post them to Instagram, and text a few poor friends and family that try and feign a small dose of enthusiasm.

This weekend we harvested several cauliflower heads (a first for us!), snow peas, the majority of the spinach that was not already bolting, some nasturtiums, five or six carrots, and a continuous supply of mesclun and romaine. 

So far, postage stamp gardening is treating us well!


Stay in the loop >>> BLOGLOVIN' | FACEBOOK | INSTAGRAM | PINTEREST | TWITTER

Tuesday, May 26, 2015

Mango Chia Pudding

Mango Chia Pudding | Windy Poplars

This is a great way to get your energy sustaining chia seeds in the morning! We love the sweet/savory Indian-inspired flavors in this easy make-ahead breakfast.

Mango Chia Pudding

1\2 cup chopped mango (fresh or frozen)
1\2 a banana
1 cup milk (I use almond milk)
1\2 t turmeric
1\4 t cinnamon
2 T chia seeds

Mix first 5 ingredients together in a blender. Add chia seeds, and stir or pulse a few times to evenly distribute. Cover and refrigerate overnight. Keeps well for up to 5 days.

For a printable version of this recipe, CLICK HERE. Original recipe inspired by Raw Food Bali.

Stay in the loop >>> BLOGLOVIN' | FACEBOOK | INSTAGRAM | PINTEREST | TWITTER

Wednesday, May 13, 2015

Cucumber Basil Gazpacho (Gluten Free)

Cucumber Basil Gazpacho - Gluten Free | Windy Poplars Blog


There's a new gazpacho in town everybody! Gazpacho (a chilled, raw soup) is a staple on the spring and summer menus here at Windy Poplars. I love how it can be prepared ahead, making it perfect for both company and my pre-prep days. 

In order to earn repeat status, the flavors must be unique, delicious, and decidedly un-Mexican. This green ultra-creamy version, is uniquely tantalizing, and uses two of the bounties of our summer vegetable garden: basil and cucumbers. Win, win! The recipe (which happens to be: gluten free, raw, and vegan) is from Allyson Kramer and her blog Eat Good Food. Enjoy!

Cucumber Basil Gazpacho

  • 1 ripe avocado, meat removed
  • 1 cucumber: skin left on, seeds removed
  • 2 small handfuls fresh basil
  • 1 clove garlic
  • 2 scallions, both green and whites
  • 2 cups water
  • 1 teaspoon sea salt
  • 2 tablespoons fruit-infused vinegar (or lime juice)

Mix all ingredients in a high powered blender until smooth. Refrigerate for at least 6 hours, or overnight (even better!). Serve cold, garnished with diced cucumber and a basil leaf, if desired. I've found that this soup keeps well in the fridge for at least 4 days.

Want more gazpacho recipes? Check out my Rustic Peach or Watermelon renditions!

For a printable version, and all the recipes featured here on Windy Poplars, visit my RECIPE BOX.


Stay in the loop >>> BLOGLOVIN' | FACEBOOK | INSTAGRAM | PINTEREST | TWITTER

Monday, April 27, 2015

Gluten Free Energy Balls

Gluten Free Energy Balls | Windy Poplars

We love these delicious little bites! Perfect for a quick boost of energy before a workout, or tossing in a lunch box (or purse when you're out running errands). They fit into my pre-prep plan like a dream, and are just as good 7 days after you made them, provided you store them in the fridge. Enjoy!

Gluten Free Energy Balls

  • 1 cup gluten free oats - you can use old-fashioned oats whole, or process them a bit for a finer texture
  • 1/2 cup smooth almond butter
  • 1/2 cup ground flax seed
  • 1/2 cup mini chocolate chips or cacao nibs (optional)
  • 1/3 cup honey 
  • 1 teaspoon vanilla extract 
Combine all ingredients in a medium sized bowl, cover, and chill for 30 minutes.

Once chilled, roll into 1" balls and store in the refrigerator for up to one week. Makes 20-25 balls.

Original recipe can be found at: Gimme Some Oven.

For a printable version of this recipe, CLICK HERE.

Stay in the loop >>> BLOGLOVIN' | FACEBOOK | INSTAGRAM | PINTEREST | TWITTER

Wednesday, April 15, 2015

Silky Caramelized Pear Soup

Silky Caramelized Pear Soup | The Recipe Box at Windy Poplars

This delicious gluten free* low carb soup is sweet and savory in equal measure, and an absolutely delightful start to your brunch, lunch, or dinner. Luxuriously smooth and rich, without an ounce of cream, the marriage of these flavors will make your taste buds dance! As with most soup, it'll taste even better the second day, so it's a perfect make-ahead for company.

Silky Caramelized Pear Soup
1 tablespoons butter
1 tablespoons coconut sugar (or brown sugar)
6 pears, peeled, cored and cut into 1 inch pieces
1 medium onion, diced
2 cloves garlic, chopped
2 sprigs fresh thyme, chopped (or 1/2 t dried, ground thyme)
4 cups gluten free chicken broth
1 bag frozen cauliflower
2 ounce reduced fat blue cheese, crumbled
1/2 cup milk - I use almond (optional)
salt and pepper to taste
Melt the butter in a large sauce pan over medium-high heat, add coconut sugar and cook until bubbling before adding the pears. Cooking until tender and lightly browned, about 5-7 minutes. (Note: If you do not have a very large pan, you may have to do this in batches so that the pear pieces do not overcrowd and steam rather than caramelize.)

Add the onion and cook until tender, about 3-5 minutes. Add the garlic and thyme and cook for another minute.

Add the broth and cauliflower, bring to a boil, reduce heat and simmer until the cauliflower is tender. Using an immersion blender, puree until smooth. You can also process in batches in a blender or food processor.

Return the soup to the pan, mix in the blue cheese, let it melt, and if you'd like the soup a bit thinner, you can add the milk at this point and season with salt and pepper to taste.

Can be served hot or cold. 6-8 appetizer-sized servings.


*Note: not all blue cheeses are gluten free, so make sure you check the package!

For a printable version, and all of the recipes posted here on Windy Poplars, CLICK HERE.

This recipe includes a few changes I've made to suit our taste and lifestyle from this original recipe on Closet Cooking. There are some really delicious sounding dishes I can't wait to try and tweak on this blog, go check it out!

Stay in the loop >>> BLOGLOVIN' | FACEBOOK | INSTAGRAM | PINTEREST | TWITTER

Thursday, March 12, 2015

Slow Cooker Saag Paneer (Gluten Free)


We are Indian food lovers over here, and as such, are always looking for fabulous recipes to add to our repertoire with rich, authentic tastes. Many, MANY recipes have not made the cut, but this one, my friends, is a winner! Huge bonus points for being a crock pot wonder! If you're a carnivore - you can easily add grilled chicken or lamb to the recipe, in place of the tofu.

Serve this over rice, with a side of naan, and you're taste buds will dance and sing - Bollywood style ;-)!

Slow Cooker Saag Paneer

6 medium or 4 large garlic cloves, finely chopped
3 Tbsp minced (or grated) ginger (can sub 1 t ground ginger if needed)
3 large yellow tomatoes, chopped
1 Tbsp garam masala
1 Tbsp ground coriander
1 Tbsp ground cumin
1 tsp sea salt
1/8 tsp cayenne pepper (if you like heat!)
1 can low fat coconut milk
2 16 oz. bags frozen spinach (or 3 10 oz. boxes), thawed
1 bag fresh baby spinach
1 package extra firm tofu

Place all ingredients except the fresh spinach and tofu into your crockpot, stir well to combine, cover and cook on low for 4 hours. Pulse with an immersion blender (or transfer to a regular blender in small batches), until everything is well mixed and slightly creamy. Add fresh spinach and tofu, and cook for another hour on low. Serve over fragrant rice (I like jasmine rice with a pinch of turmeric and cardamom), and enjoy!


For a printable version, and to see all the recipes featured here on Windy Poplars, CLICK HERE.


Stay in the loop >>> BLOGLOVIN' | FACEBOOK | INSTAGRAM | PINTEREST | TWITTER

Tuesday, March 3, 2015

Winter Saturdays at Windy Poplars


My husband and I have accidentally stumbled upon the sweetest of weekend traditions, and it has been such a pleasant addition to our lives, I thought I'd share a bit about it with you today.

Have you heard of freezer cooking? I've done versions of it for years (making large batches of meals, or components of meals, and freezing them for later use), but this has been the most enjoyable version yet!

Every Saturday morning finds us at the farmer's market. Sipping locally roasted coffee, catching up with other shoppers, and stocking up on produce, meat, and eggs for the week.

Our next stop is the conventional grocery store to round out my list, then back home to unload and put it all away. Once we've got everything sorted, we spend a couple hours prepping a large portion of the food for the week together, and our reward is a lazy evening listening to Prairie Home Companion and munching on the fruits of our labor.

Each week has a different menu, of course, but this week in less than 3 hours we knocked out: Beef Stew, Broccoli Jarlesburg Soup, Swiss Meusli, Pumpkin Custard, a G-free Loaf of Bread, Jarlsburg Dip, No-Cook Energy Balls, Roasted Mashed Cauliflower, Saag Paneer, Mango Tumeric Chia Pudding, and Hard Boiled Eggs.

Now this doesn't mean I don't have to cook at all this week, but it tremendously lightens the load! I always thought weekend food prep was for the 9-5ers, but, while I absolutely love cooking, around 5pm isn't my most inspired hour of the day!

It's been great just pulling the main dish out of the freezer to thaw, or dumping it in the crockpot, and one of my favorite parts? Having healthful breakfast options already. made. in the morning! Can I get an "amen" from all those non-morning people out there??

So what about you? Do you pre-prep or freezer cook? If not, would you like to learn more about it?

Stay in the loop >>> BLOGLOVIN' | FACEBOOK | INSTAGRAM | PINTEREST | TWITTER

Monday, March 17, 2014

Crockpot Morocan Lentil Stew

This stew is both unusual and delicious! VERY hearty, and sure warms you up on a nice chilly day. Originally from a A Year of Slow Cooking.


Crockpot Moroccan Lentil Stew

–1 cup dried lentils
–1 can garbanzo beans, drained and rinsed
–1 can pinto beans, drained and rinsed
–1 onion, chopped
–2 garlic cloves, minced
–1/2 cup chopped celery
–1/2 cup chopped carrots
–28 oz can of diced tomatoes (and juice)
–4 cups vegetable broth
–1 1/2 tsp garam masala
–1/2 tsp cayenne pepper
–1/2 tsp cumin
–1/4 tsp nutmeg
–1/4 tsp cinnamon
–1 inch ginger, peeled and grated


Use at least a 5 quart crockpot for this. It makes a lot.

Chop up all of your vegetables and add them to the crockpot. Drain and rinse off the beans, add to the pot. Add the dried lentils. Grate your ginger, and add it along with the dried spices. 

Stir in the vegetable broth and tomatoes.

Cover and cook on low for 8-10 hours. Soup tastes best the longer you cook it, and it is even better the next day. I thought it needed a bit of salt added, but that could just be because I used no-salt tomatoes, and low sodium broth. - If it's a bit spicy for your taste, add a dollop of sour cream or plain yogurt to each individual bowl.

Before serving, use an immersible blender and pulse to blend some of the vegetables and beans together. This isn’t necessary, but it really improves the texture of the soup and melds the flavors nicely.

For a printable version, CLICK HERE.

Monday, November 18, 2013

Chickpea Butternut Squash Stew

Chickpea Butternut Squash Stew | Windy Poplars

 Chickpea Butternut Squash Stew

  • 1 medium butternut squash, cut into 1 1/2-inch irregularly shaped pieces (about 6 cups)
  • 3 tablespoons extra-virgin olive oil
  • Sea salt
  • Freshly ground black pepper
  • 2 medium onions, chopped (about 2 1/2 cups)
  • 8 large cloves garlic, finely chopped
  • 1 1/2 teaspoons ground cumin
  • 1 teaspoon paprika
  • 3 medium carrots, cut into 3/4-inch cubes or irregular shapes
  • 2 1/2 cups cooked chickpeas (either from dry beans or from two 15-ounce cans)
  • 1 can crushed tomatoes (28 ounces)
  • 4 teaspoons Harissa, or more to taste

Directions

  1. Preheat oven to 375 degrees. Place squash on a baking sheet lined with parchment. Drizzle with 1 1/2 tablespoons olive oil and salt and pepper. Toss well and roast until golden brown, 45 to 50 minutes.
  2. In a large skillet or pot, warm remaining 1 1/2 tablespoons olive oil over medium-high heat. Add onions and a pinch each of salt and pepper. Cook for 3 to 4 minutes. Stir in garlic and cook for 3 minutes. Stir in cumin, and paprika, and cook for 1 minute. Add carrots and 1 cup chickpea cooking liquid (or water, if using canned chickpeas) to onion mixture. Bring to a boil over high heat. Reduce heat to low and simmer, covered, until carrots are tender, 10 to 12 minutes.
  3. Add tomatoes and chickpeas. Raise heat to medium-high and simmer for 10 minutes. Stir in harissa paste, roasted squash, and remaining 1/2 cup chickpea cooking liquid (or water). Simmer, uncovered, until flavors meld, another 3 minutes. Season with salt and pepper to taste.
For a printable version, CLICK HERE.


Stay in the loop >>> BLOGLOVIN' | FACEBOOK | INSTAGRAM | PINTEREST | TWITTER

Tuesday, May 28, 2013

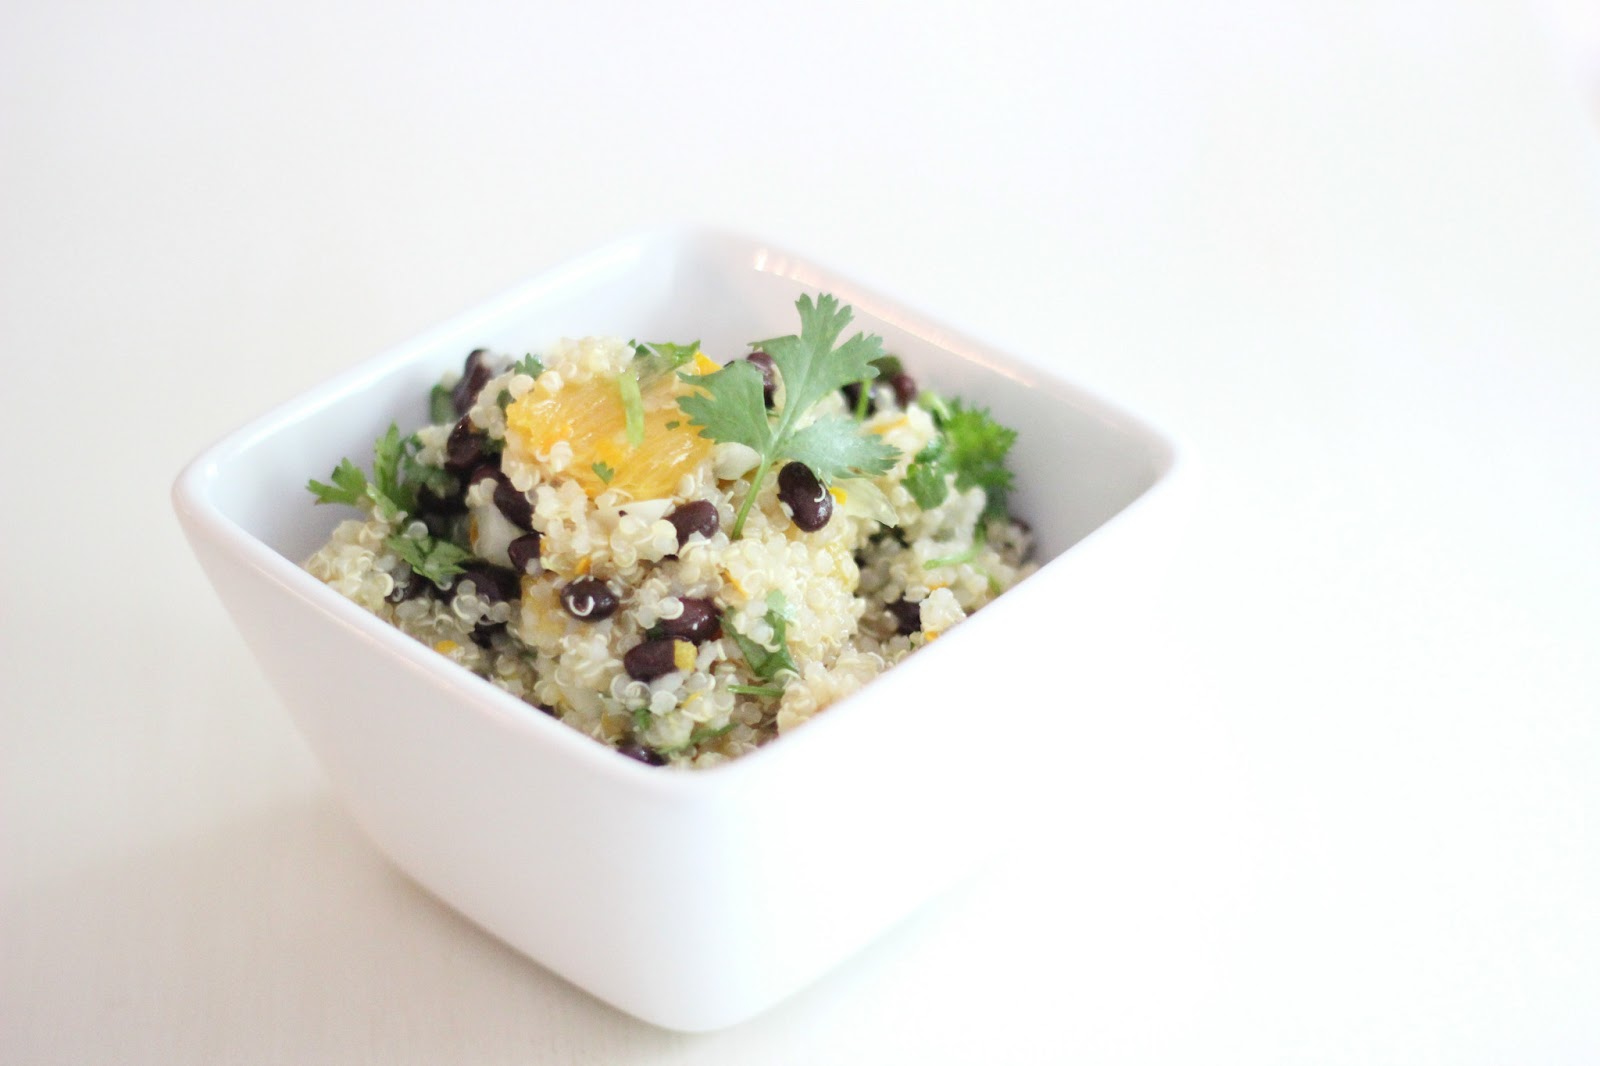
Black Bean Quinoa Citrus Salad

This salad is so incredibly refreshing and light! You'll love the bright citrus flavors that easily compliment any meal. While most grain salads benefit from being made ahead and allowed to blend, I prefer this one relatively fresh: make no more than 3 or 4 hours before serving. Original recipe found on theKitchn.


Black Bean Quinoa Citrus Salad


Serves 4-6
1 cup uncooked quinoa (any color), rinsed and drained
2 cups water
2 large oranges
1/4 cup extra virgin olive oil
2 teaspoons apple cider vinegar
1/2 teaspoon honey
1/2 teaspoon coriander (crushed)
1/2 teaspoon salt
Freshly ground black pepper
1/4 cup chopped cilantro
1 1/2 cups (or 1 can) cooked black beans, rinsed and drained
1/2 small sweet onion, thinly sliced

Place quinoa and water in a small saucepan. Bring to a boil, cover, and simmer over low heat. Simmer for about 15 minutes, or until all liquid is absorbed. Remove from heat and let stand for 5 minutes. Fluff quinoa with a fork and spread on a parchment-lined baking sheet to cool.

Prepare oranges while quinoa is cooling. Finely grate the zest of one orange and set aside. Supreme both oranges, reserving the juice (squeeze the orange membranes after segmenting), and set aside.

In a small bowl, whisk together orange zest, 3 tablespoons of orange juice, olive oil, apple cider vinegar, honey, coriander, salt, a few cracks of pepper, and chopped cilantro. Adjust seasonings if desired.

Place quinoa, black beans, onion, and orange segments in a large bowl and stir gently to combine. Pour dressing over salad and toss gently to coat.

Serve immediately or refrigerate until ready to serve.


Looking for more delicious healthy recipes? My new Recipe Box site is still under construction, but you can find lots of the old recipes being transferred from Victuals over there.

Stay in the loop >>>> BLOGLOVIN' | FACEBOOK | INSTAGRAM | PINTEREST | TWITTER

Friday, May 3, 2013

Blueberry Yogurt Bites


Here is a delightful little snack that is easy to prepare, healthful, and delicious! Plain Greek yogurt, blueberries, and maple syrup are all it takes. Mix, dollop onto wax paper, and freeze. Once frozen, remove them to a freezer bag or container, and pop one out whenever the craving for something sweet strikes!


Stay in the loop >>> BLOGLOVIN' | FACEBOOK | INSTAGRAM | PINTEREST | TWITTER